🔗 Fivetran File Connector Setup Guide
This guide walks through the steps required to set up a file-based data connector in Fivetran and load data into Snowflake.
📋 Prerequisites
Before you begin, make sure you have:
- ✅ Access to the Fivetran dashboard
- ✅ A cloud file storage system (e.g., S3, Azure Blob, SFTP)
- ✅ A working Snowflake destination set up in Fivetran
📂 Step-by-Step Setup
📂 Step 1: Prepare Your File Source
Choose a supported file source:
- ✅ Amazon S3
- ✅ Azure Blob Storage
- ✅ Google Cloud Storage (GCS)
- ✅ SFTP, FTPS
- ✅ Dropbox, Box
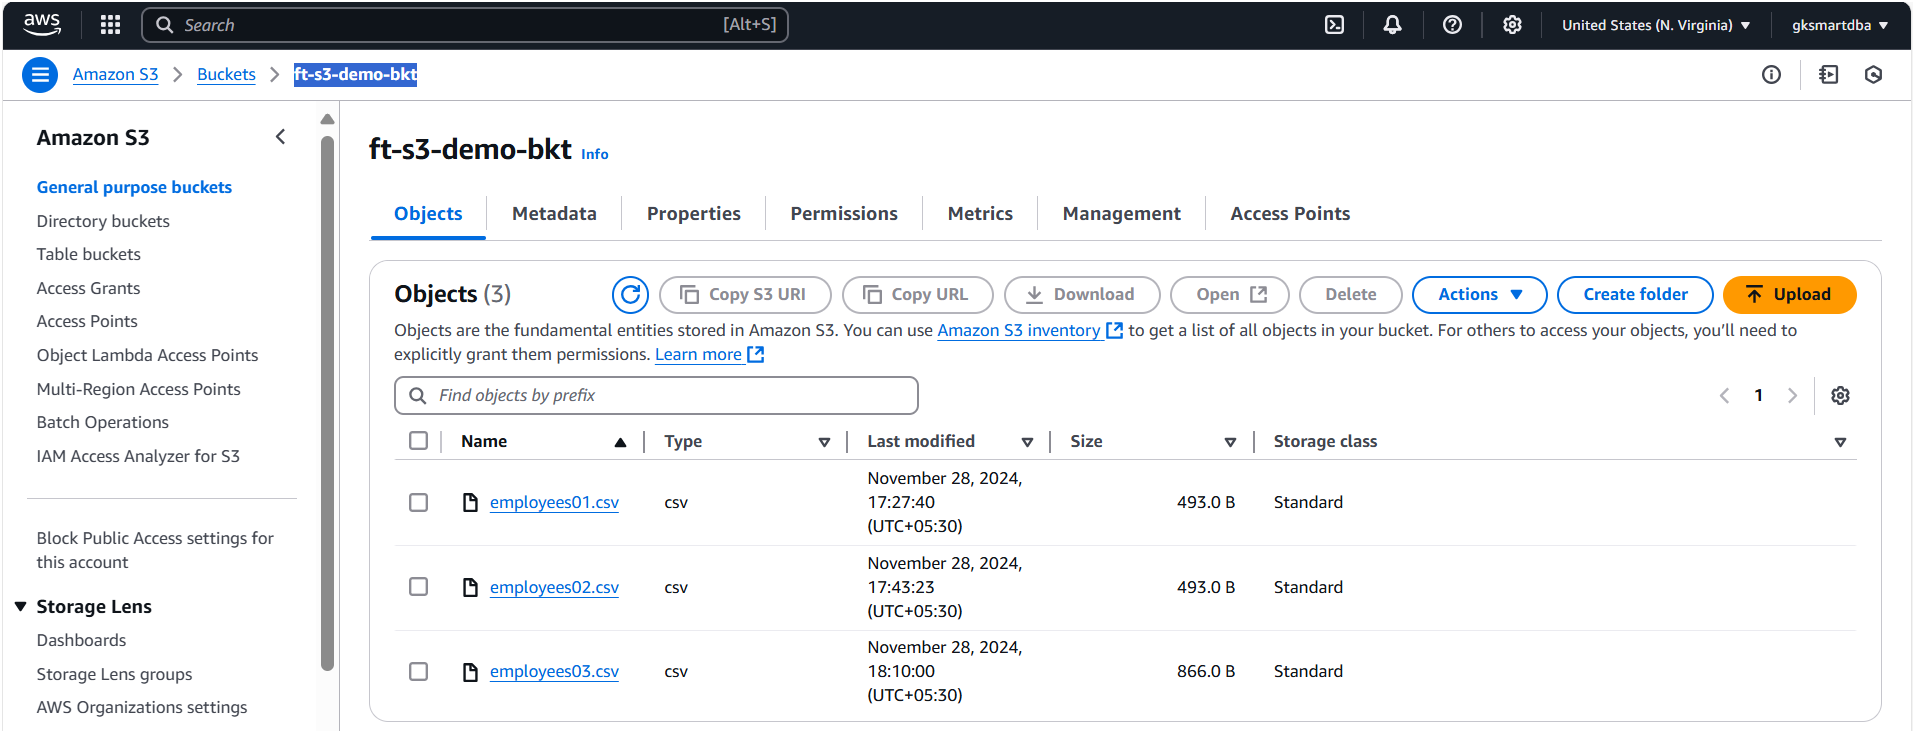
Steps to set S3 as source:
- Create a folder:
s3://your-bucket/my_data/- Upload test files like:
sales.csv,employees.json, etc.
🔗 Step 2: Set Up File Connector in Fivetran
- From the Fivetran dashboard, click ➕ Add Connector
- Search for "Files" and select your storage type (e.g., S3)
🔐 Step 3: Provide Authentication to Your Cloud Storage
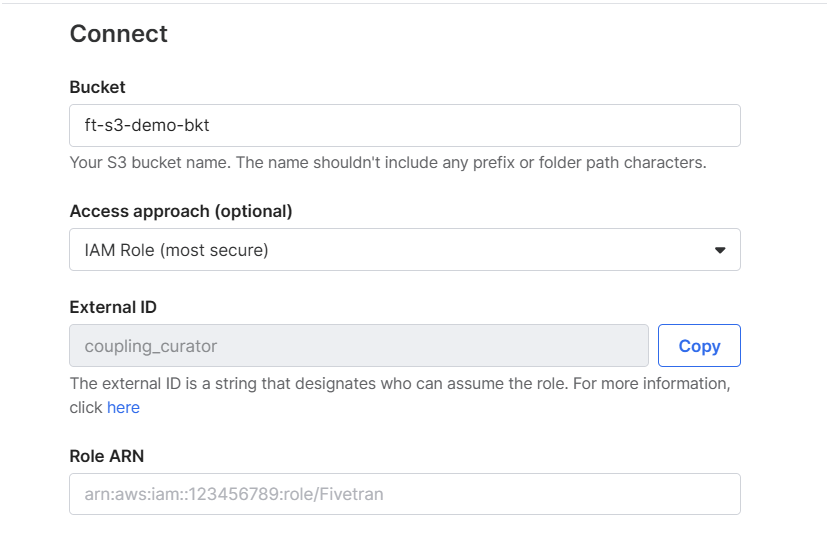
To allow Fivetran to access your files stored in a cloud service (like S3), you must set up authentication.
✅ Options:
- IAM Role ARN (Recommended)
- Access Key ID + Secret Access Key (for simpler setups or testing)
🔐 Step 3.1: Set Up IAM Role ARN (Recommended)
🛠️ Create an IAM Policy
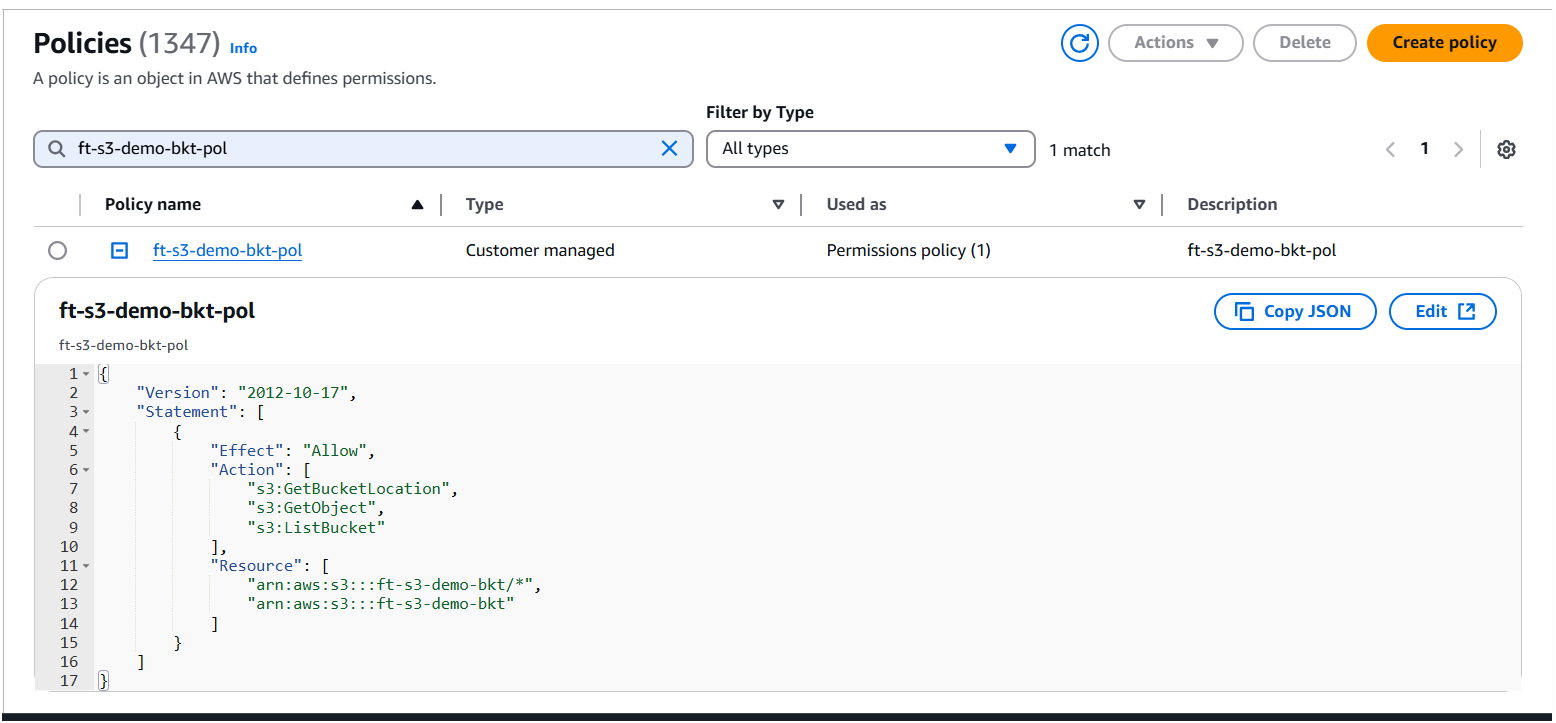
This policy gives Fivetran read-only access to your S3 bucket.
{
  "Version": "2012-10-17",
  "Statement": [
    {
      "Sid": "FivetranS3ReadAccess",
      "Effect": "Allow",
      "Action": [
        "s3:GetObject",
        "s3:ListBucket"
      ],
      "Resource": [
        "arn:aws:s3:::your-bucket-name",
        "arn:aws:s3:::your-bucket-name/*"
      ]
    }
  ]
}
🛡️ Step 1: Create IAM Policy for S3 Access
This policy grants Fivetran the required read-only permissions to access your S3 bucket.
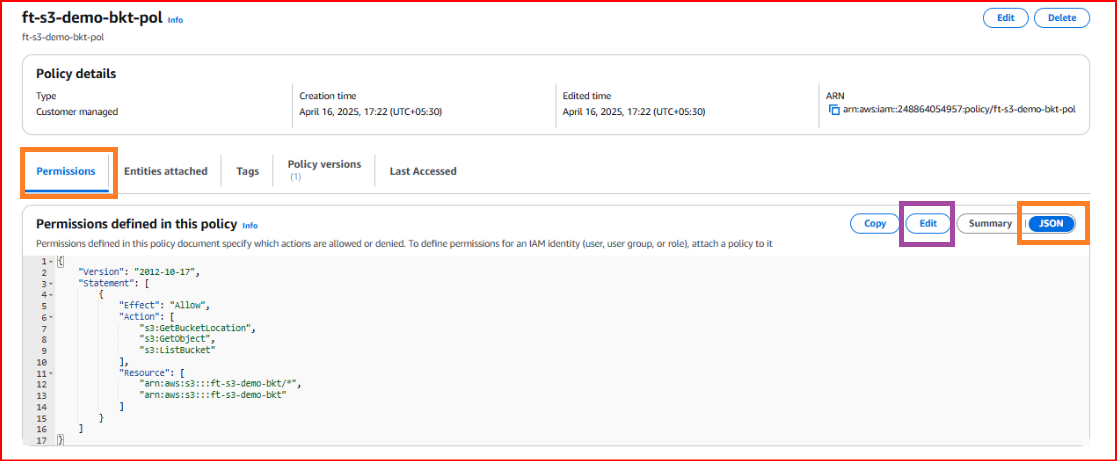
📝 Step 2: Edit Policy to Define Specific Permissions
Customize the policy by specifying the correct bucket and permission actions.
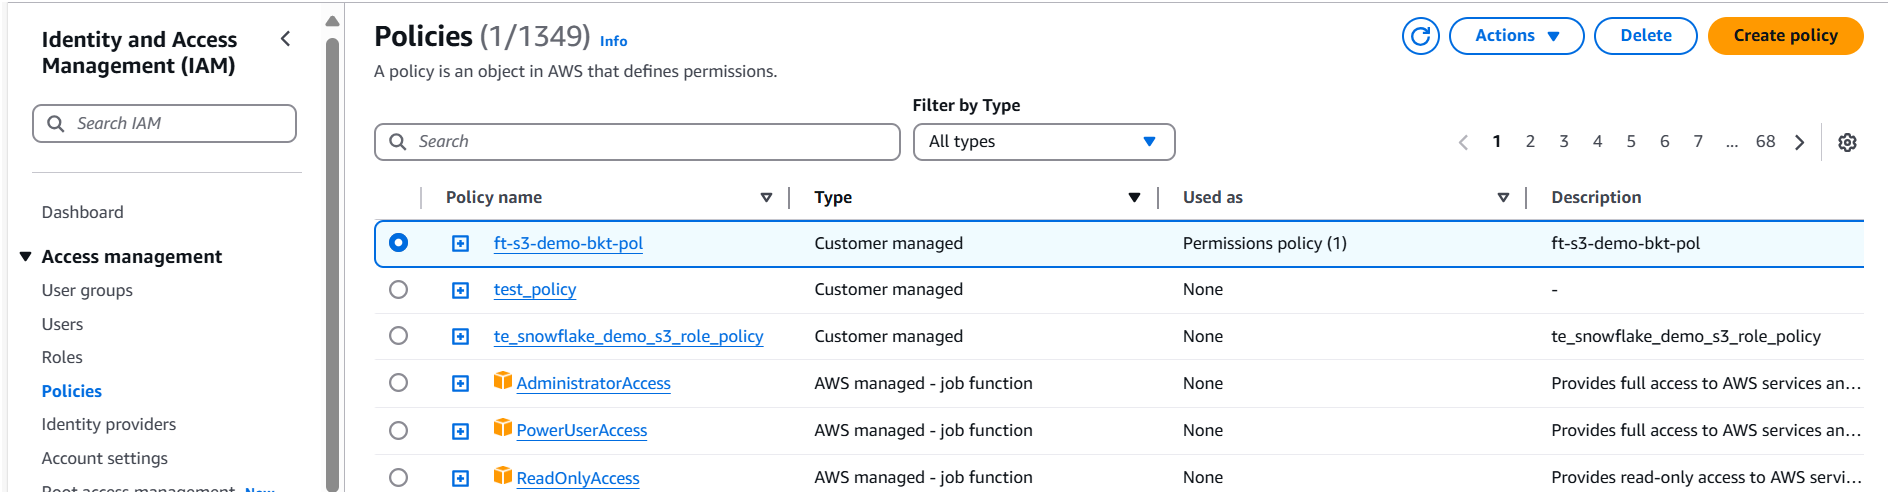
✅ Step 3: Verify IAM Policy Configuration
Ensure your IAM policy is saved correctly and reflects your intended permissions.
🔐 Step 4: Create IAM Role and Attach Policy
Now create an IAM role and attach the policy you just created. This role will be assumed by Fivetran.
🔄 Trust Relationship Configuration
Configure the trust relationship to allow Fivetran to assume the role.
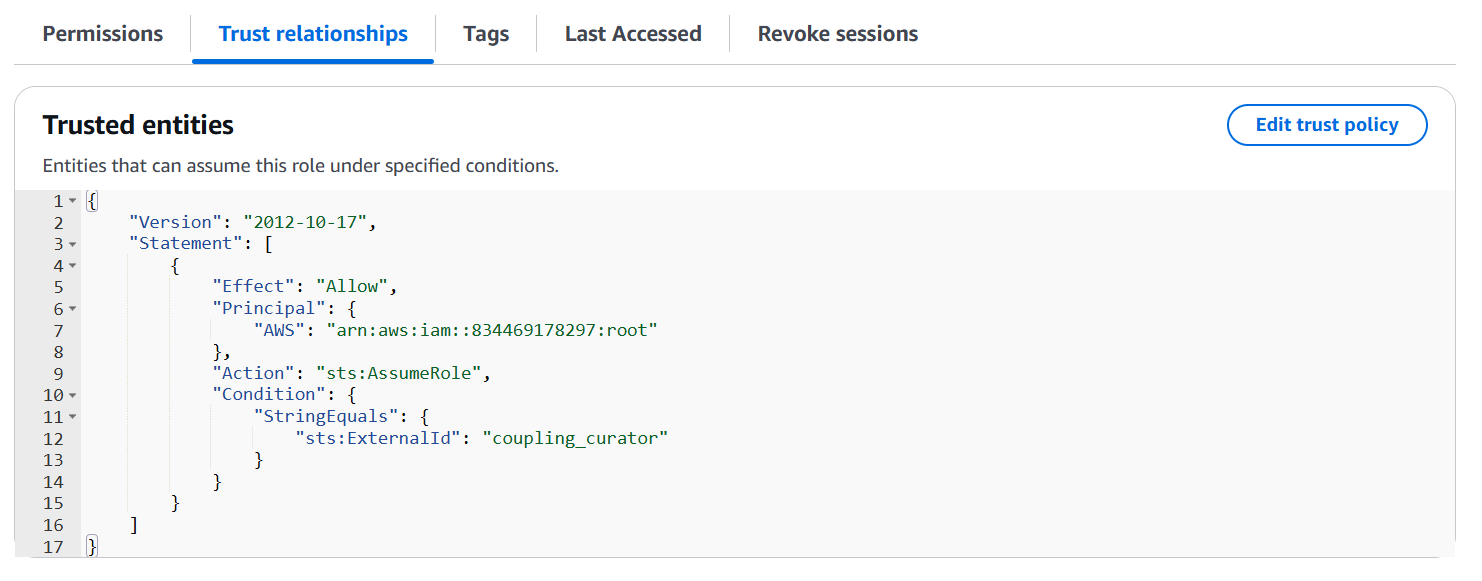
📌 Step 5: Retrieve IAM Role ARN
Copy the Role ARN for use when configuring the Fivetran connector.
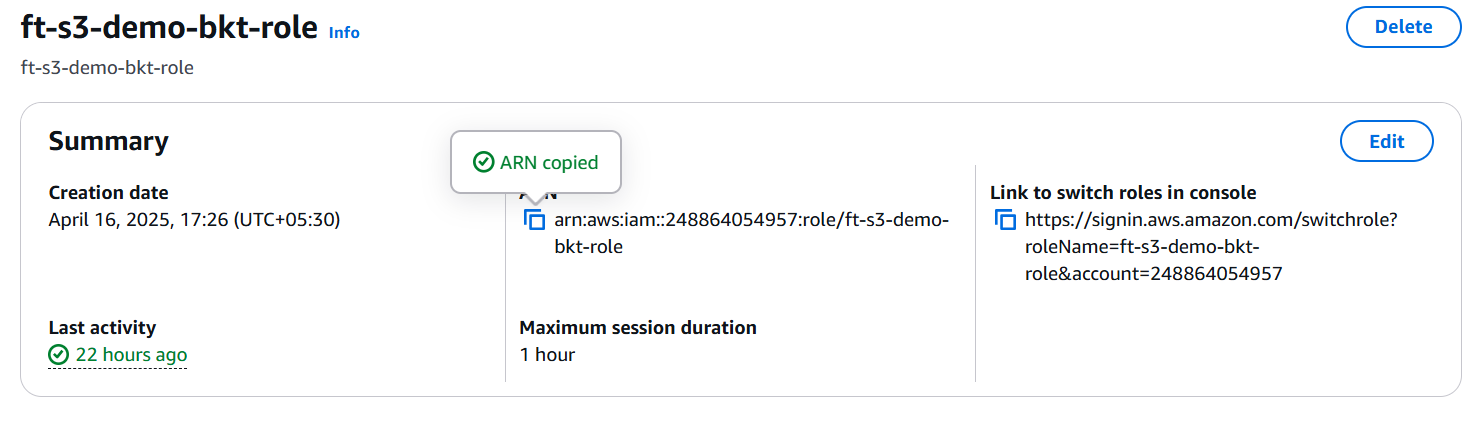
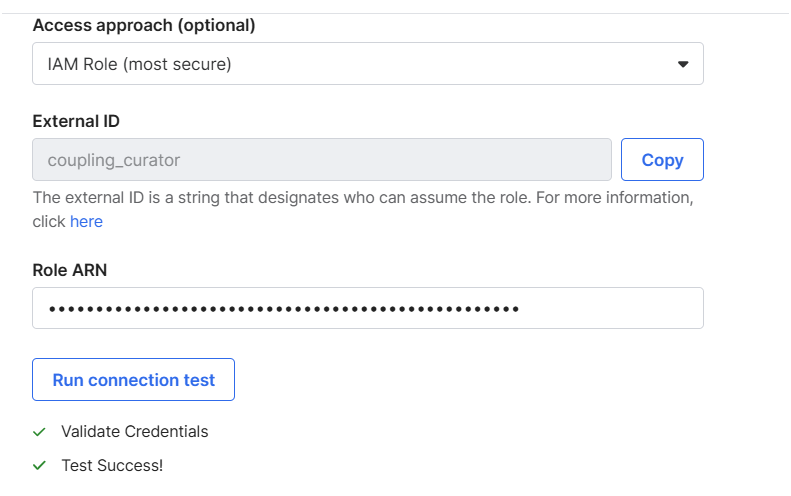
🔄 Step 4: Connect to S3 in Fivetran
- Enter the IAM Role ARN in Fivetran
- Click Test Connection
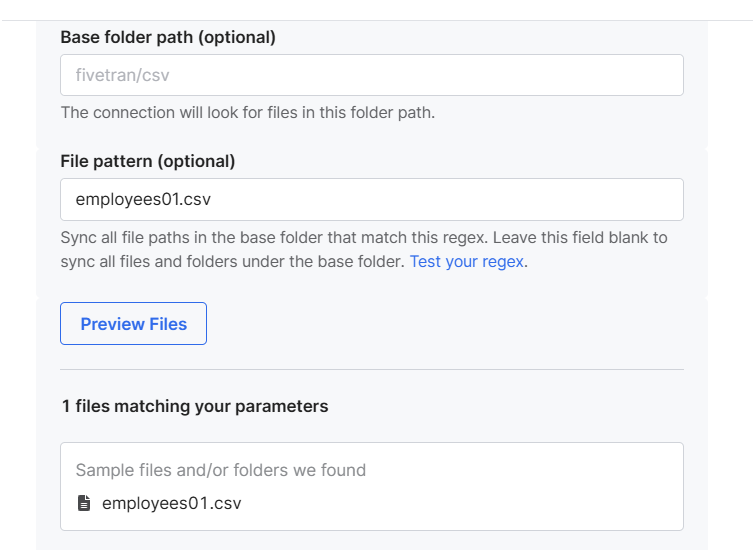
- Set folder path and optional wildcards
e.g.,my_data/*.csv
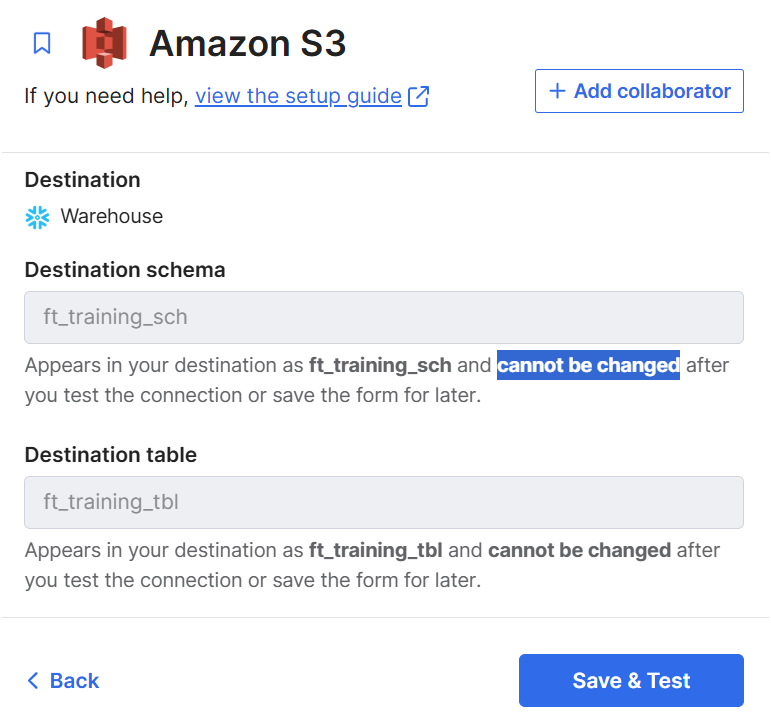
- Choose your destination schema and destination table name
Happy syncing! 🚀