🚀 Setting up Free Trial Account
This guide helps you set up a Fivetran File Connector to ingest files from cloud storage into Snowflake. Ideal for CSV, JSON, Excel, Parquet, and other file-based data ingestion.
🧪 Step 0: Create a Free Trial Fivetran Account
- Go to Fivetran Signup
- Sign up using your work email
- Verify your email and log in to the Fivetran dashboard
- You now have access to a 14-day free trial with full feature access
🖼️ Trial Dashboard Preview
Once logged in, you'll see a screen similar to this:
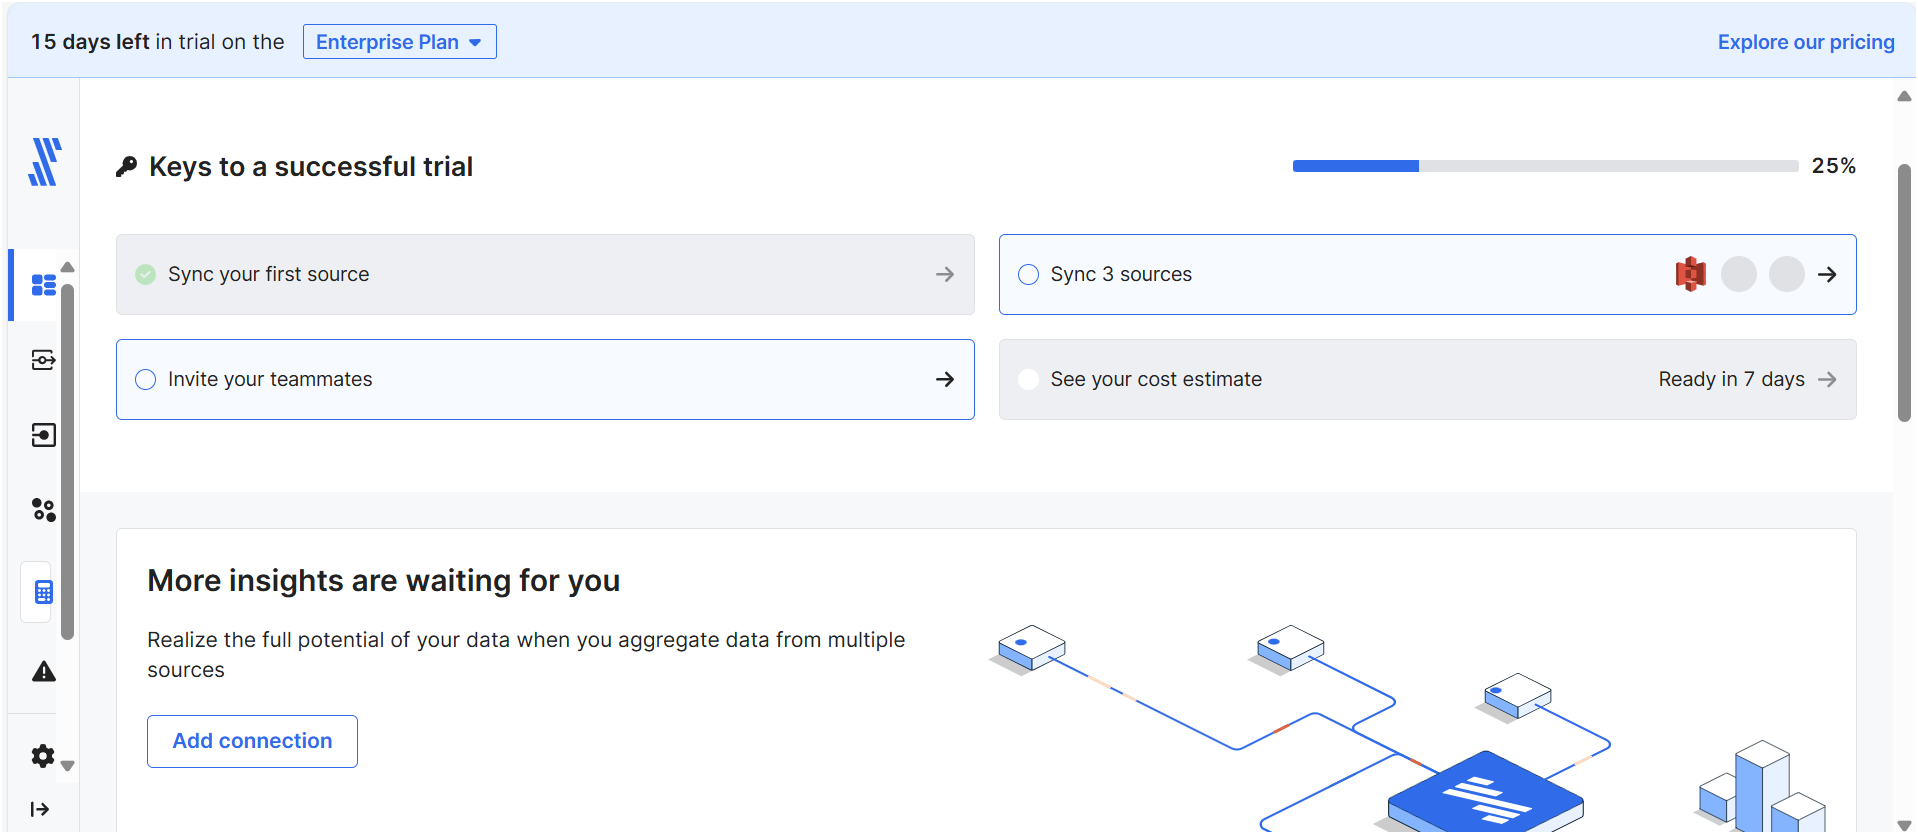
ℹ️ Note: If you're running this Markdown in a GitHub repo or static site generator like Docusaurus, make sure the image path above matches your folder structure.
📂 Step 1: Prepare Your File Source
Choose a source:
- ✅ Amazon S3
- ✅ Azure Blob
- ✅ Google Cloud Storage (GCS)
- ✅ SFTP, FTPS
- ✅ Dropbox, Box
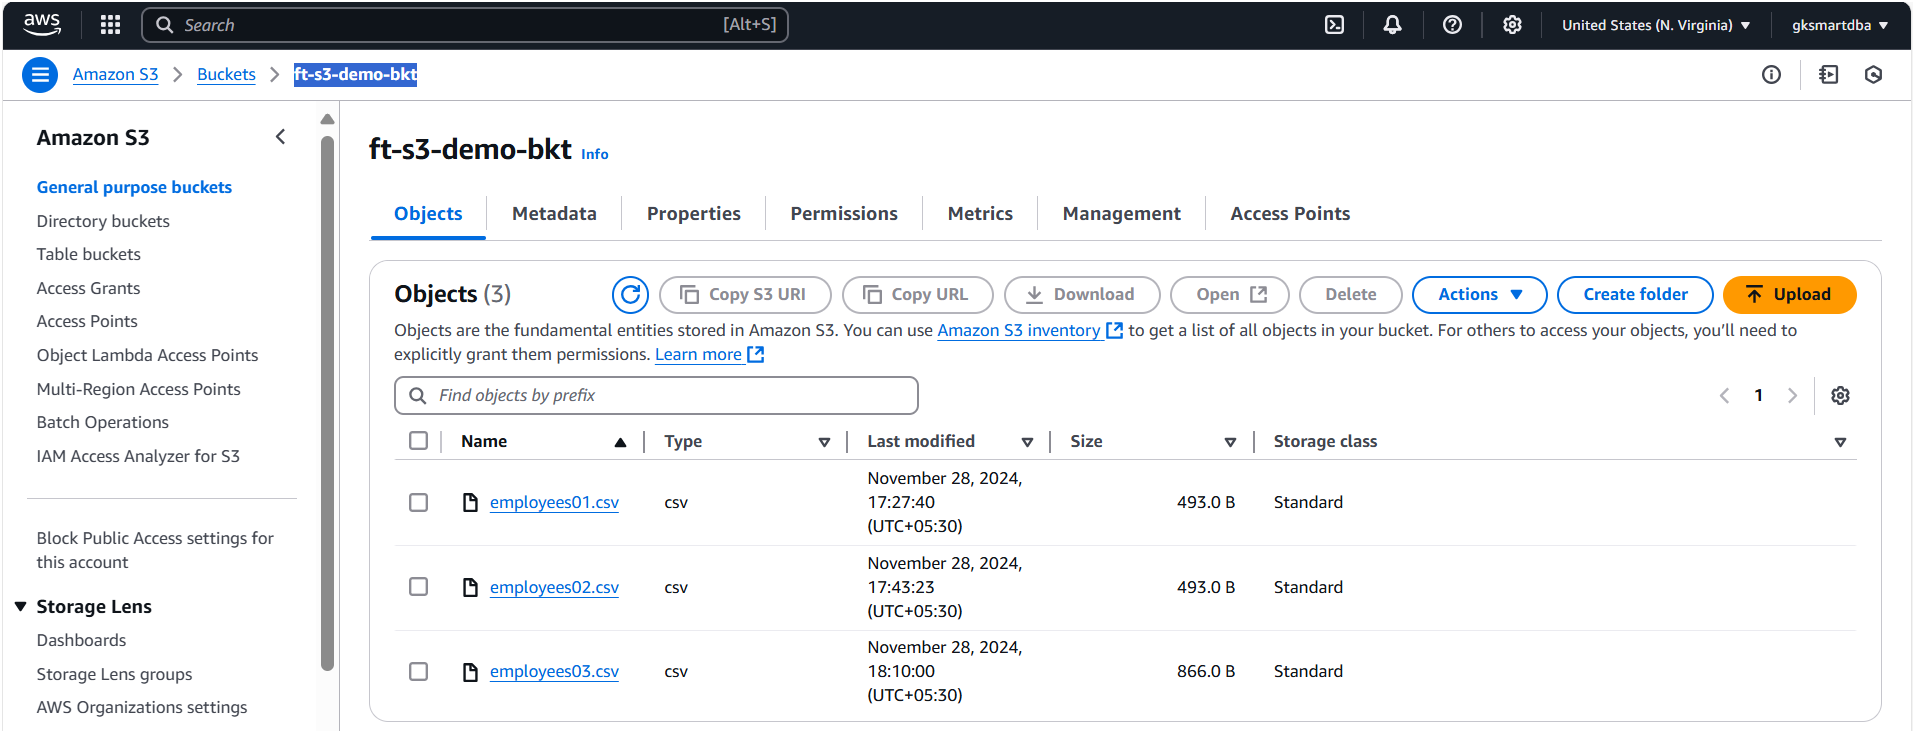
Setps to set S3 as source:
- Create a folder:
s3://your-bucket/my_data/- Upload test files:
sales.csv,employees.json, etc.
🔗 Step 2: Set Up File Connector in Fivetran
- From the dashboard, click ➕ Add Connector
- Search for "Files" and select your storage type (e.g., S3)
🔐 Step 3: Provide Authentication to Your Cloud Storage
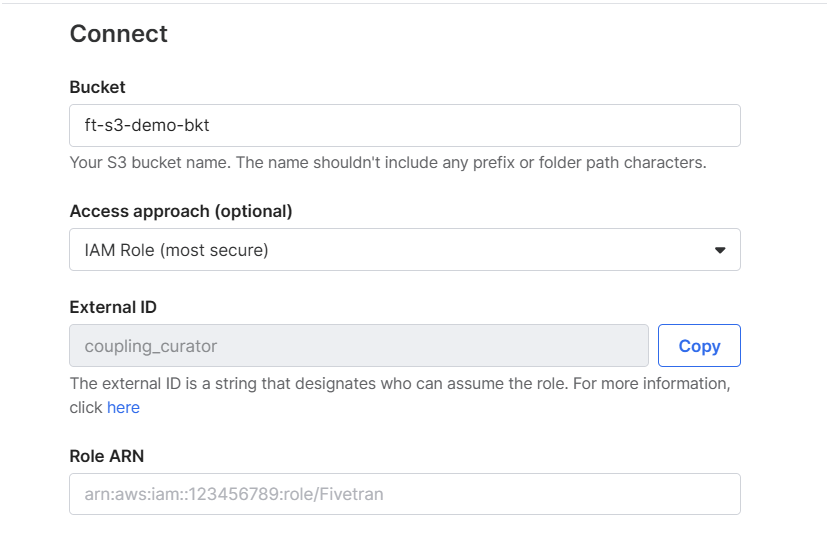
To allow Fivetran to access your files stored in a cloud service (like S3), you must set up authentication.
✅ Options:
- IAM Role ARN (Recommended)
- Access Key ID + Secret Access Key (for simpler setups or testing)
Provide Authentication to Your Cloud Storage using IAM Role ARN (Recommended)
🛠️ Step 1: Create an IAM Policy (for S3)
This policy gives Fivetran read-only access to your S3 bucket.
Example Policy:
{
  "Version": "2012-10-17",
  "Statement": [
    {
      "Sid": "FivetranS3ReadAccess",
      "Effect": "Allow",
      "Action": [
        "s3:GetObject",
        "s3:ListBucket"
      ],
      "Resource": [
        "arn:aws:s3:::your-bucket-name",
        "arn:aws:s3:::your-bucket-name/*"
      ]
    }
  ]
}
🛠️ Step 1.1: Create an IAM Policy (for S3)
This policy gives Fivetran read-only access to your S3 bucket.
Policy:
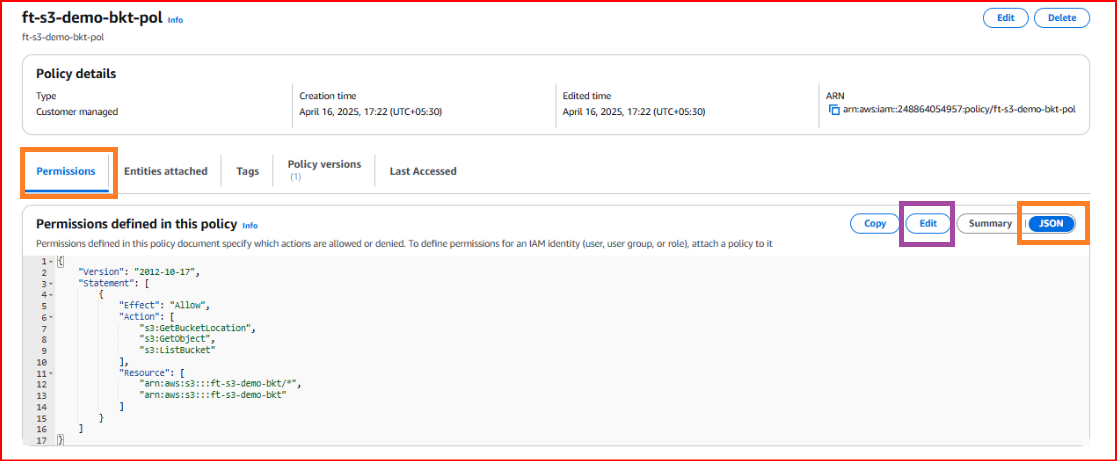
🛠️ Step 1.2: Editing Permission (for S3)
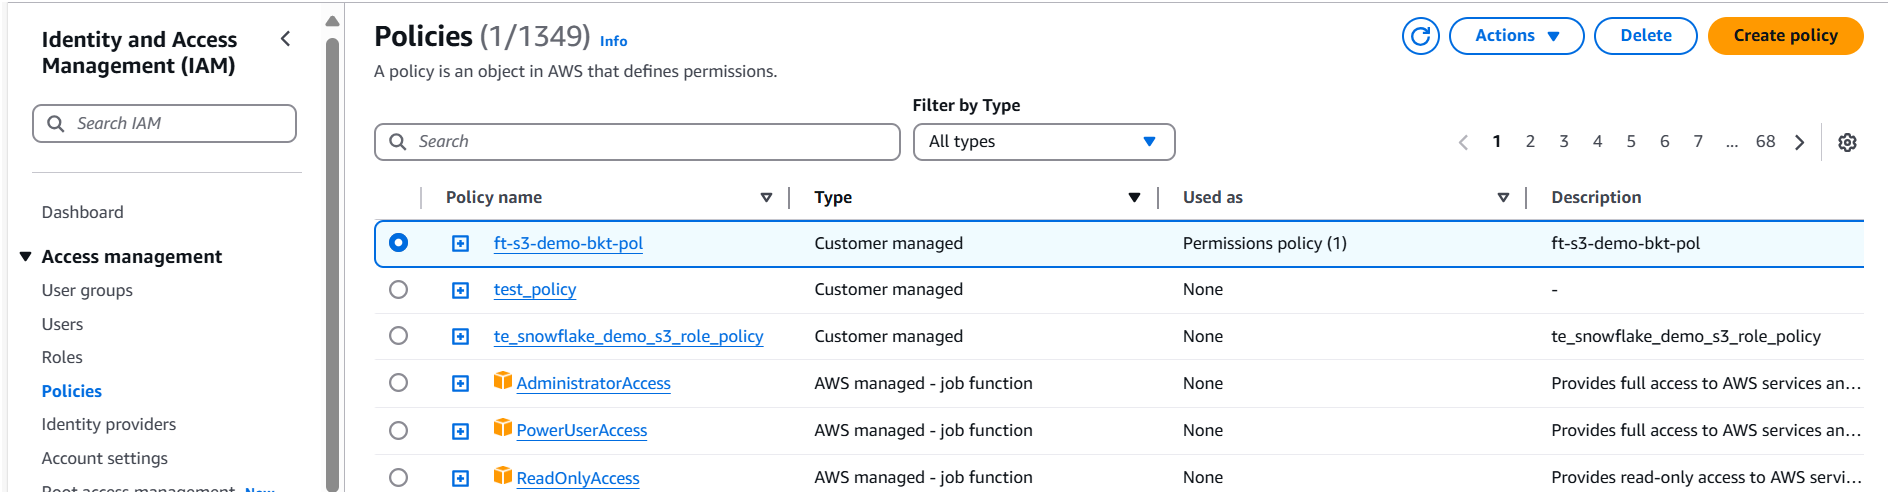
🛠️ Step 1.3: Verifying Permission (for S3)
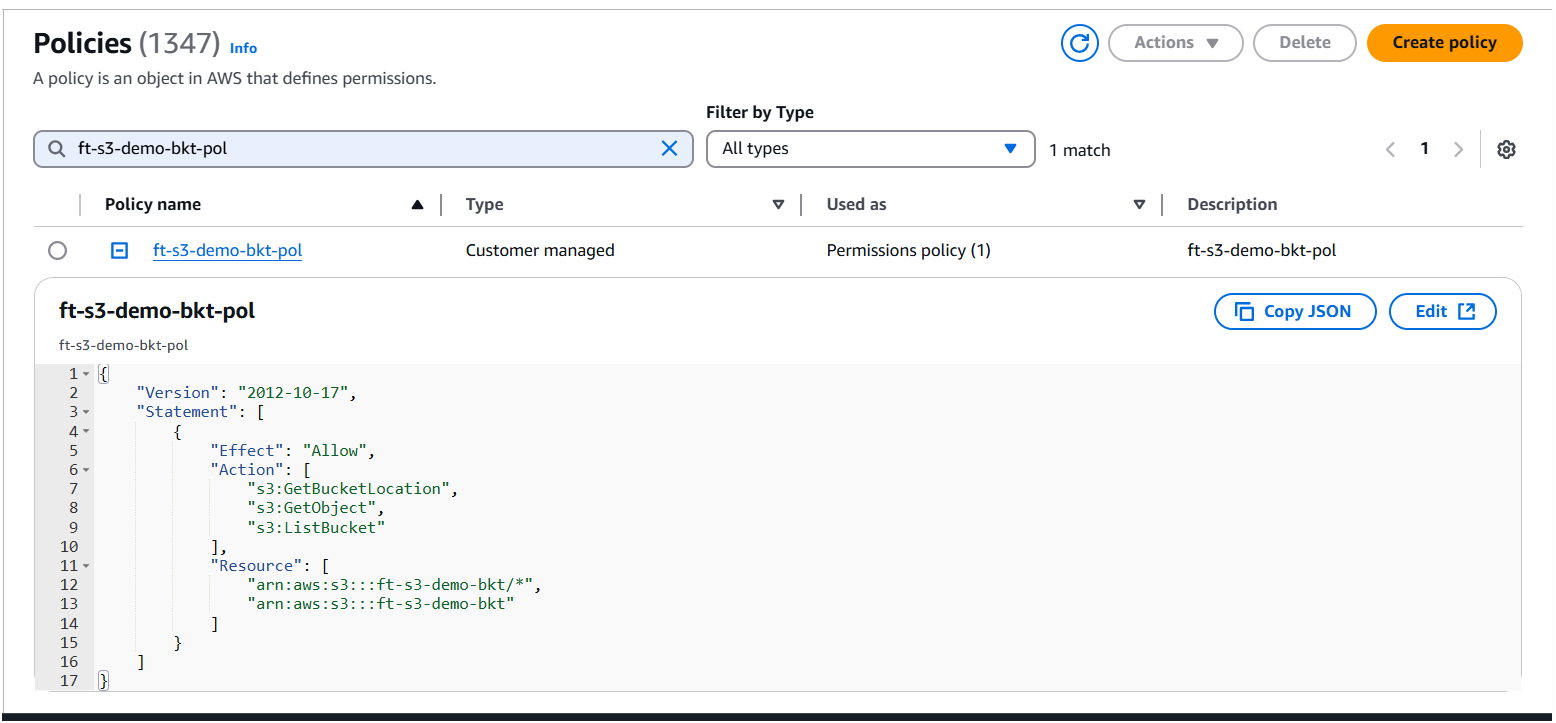
🛠️ Step 1.4: Create an IAM Role with Created Policy (for S3)
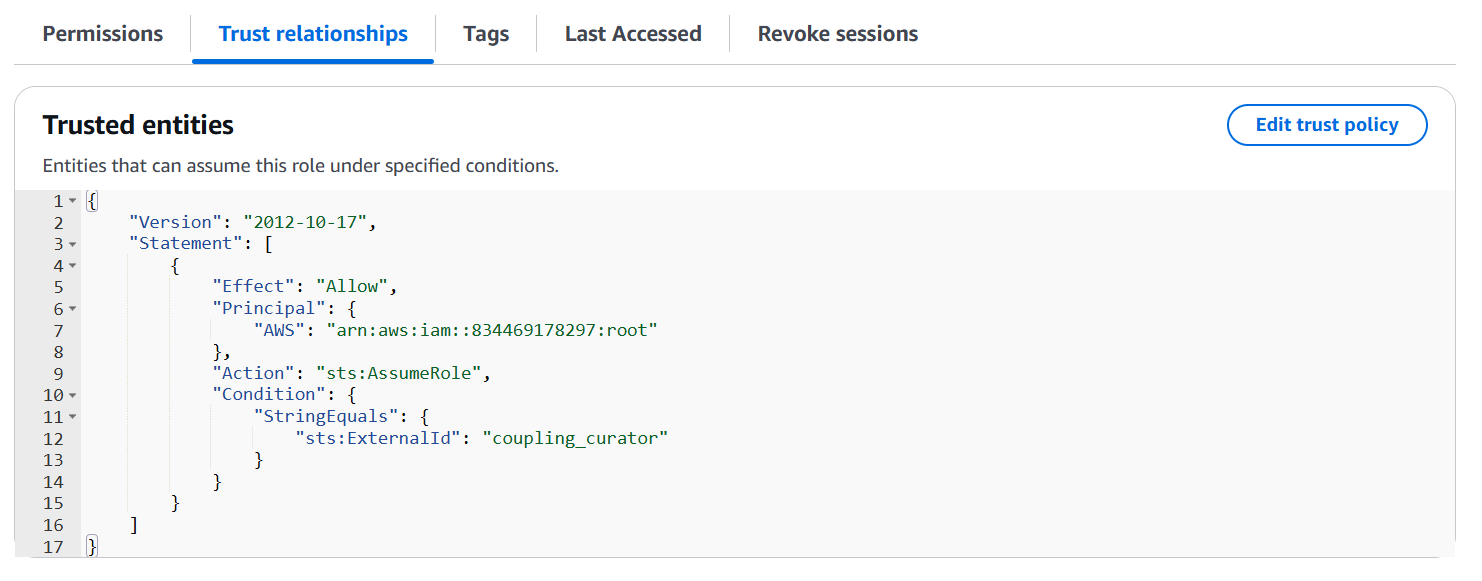
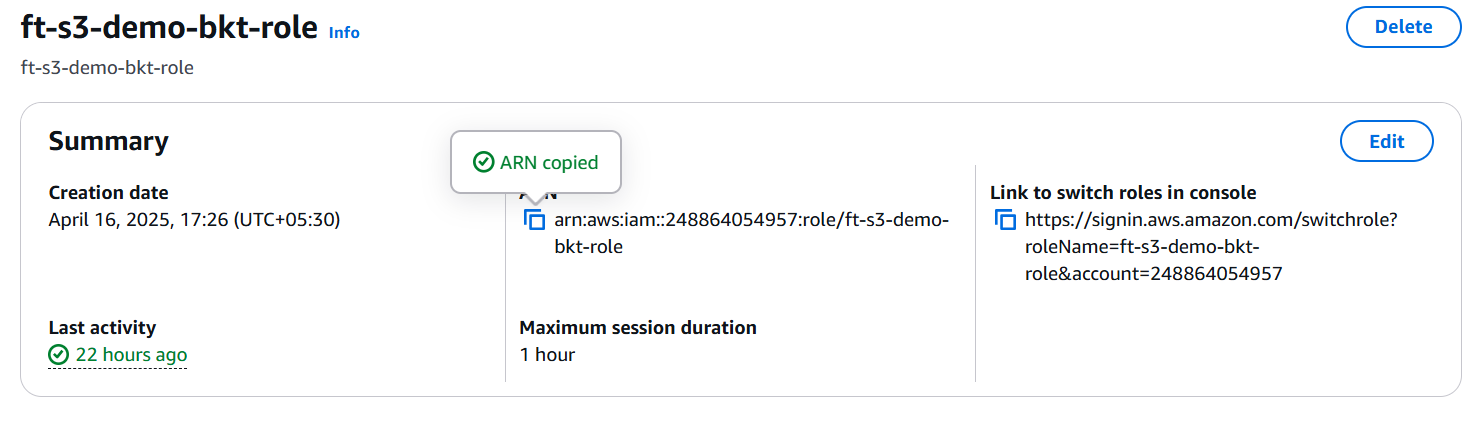
🛠️ Step 1.5: Getting Role ARN (for S3)
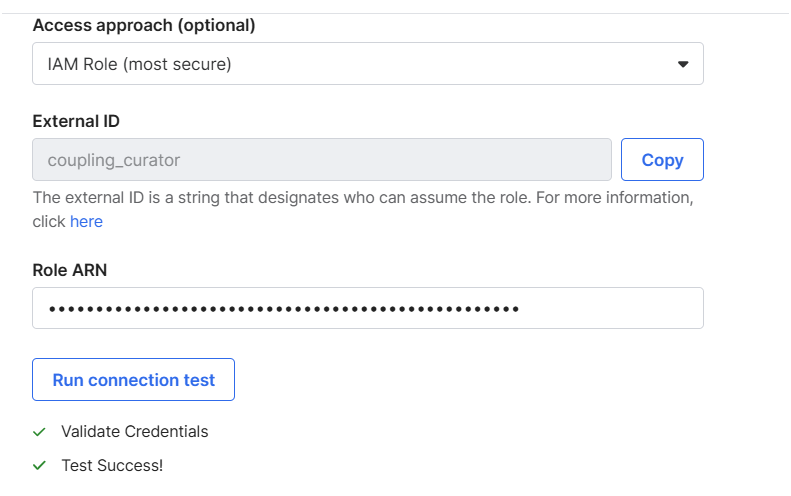
- 🛠️ Step 1: Setting Role ARN (for S3) & Test the Connection
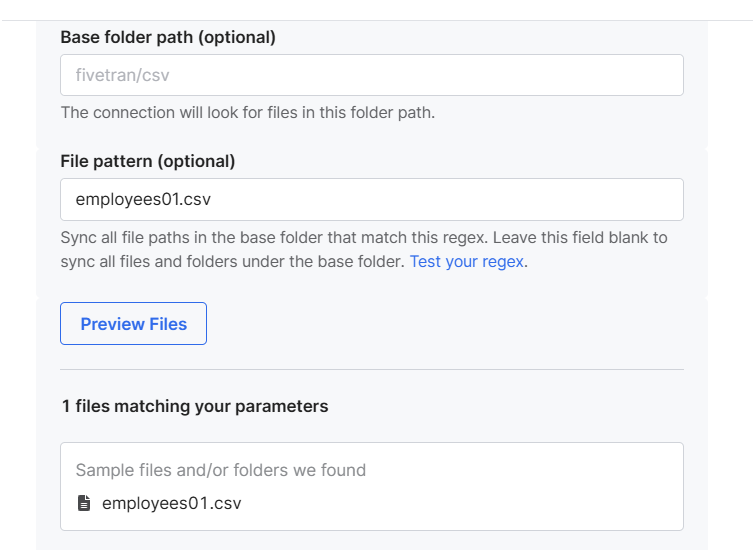
- Set folder path and optional wildcards:
- e.g.,
my_data/*.csv
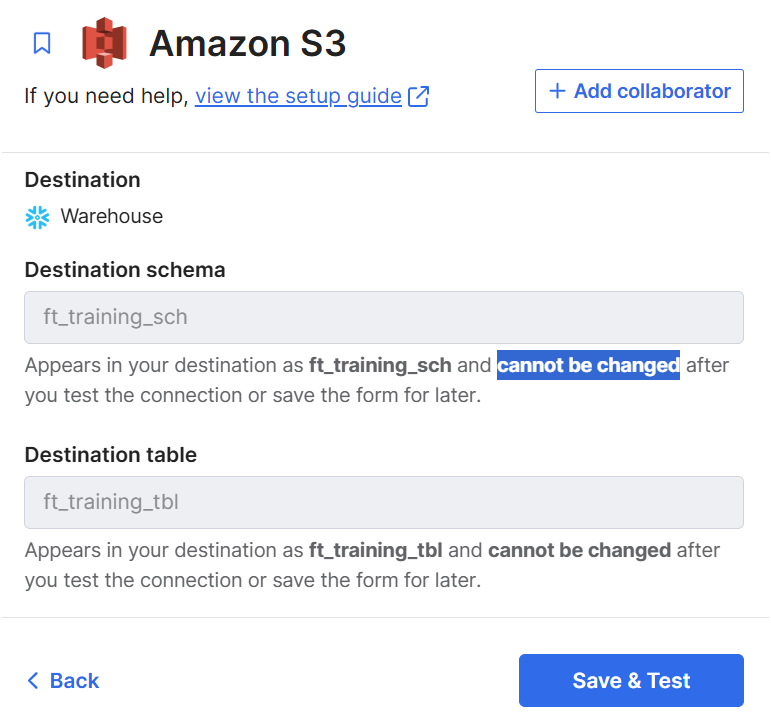
- Choose your destination schema and destination table name
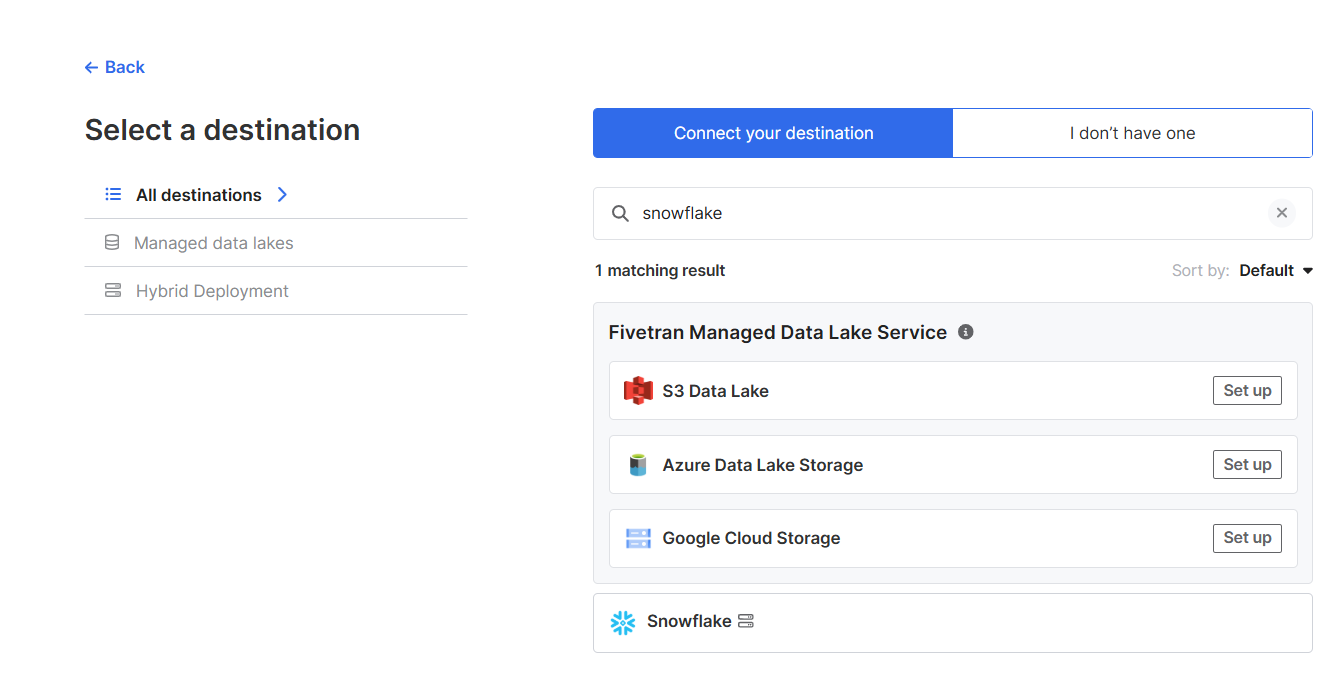
🏗️ Step 3: Set Up Destination – Snowflake
- Click ➕ Add Destination (if not already set)
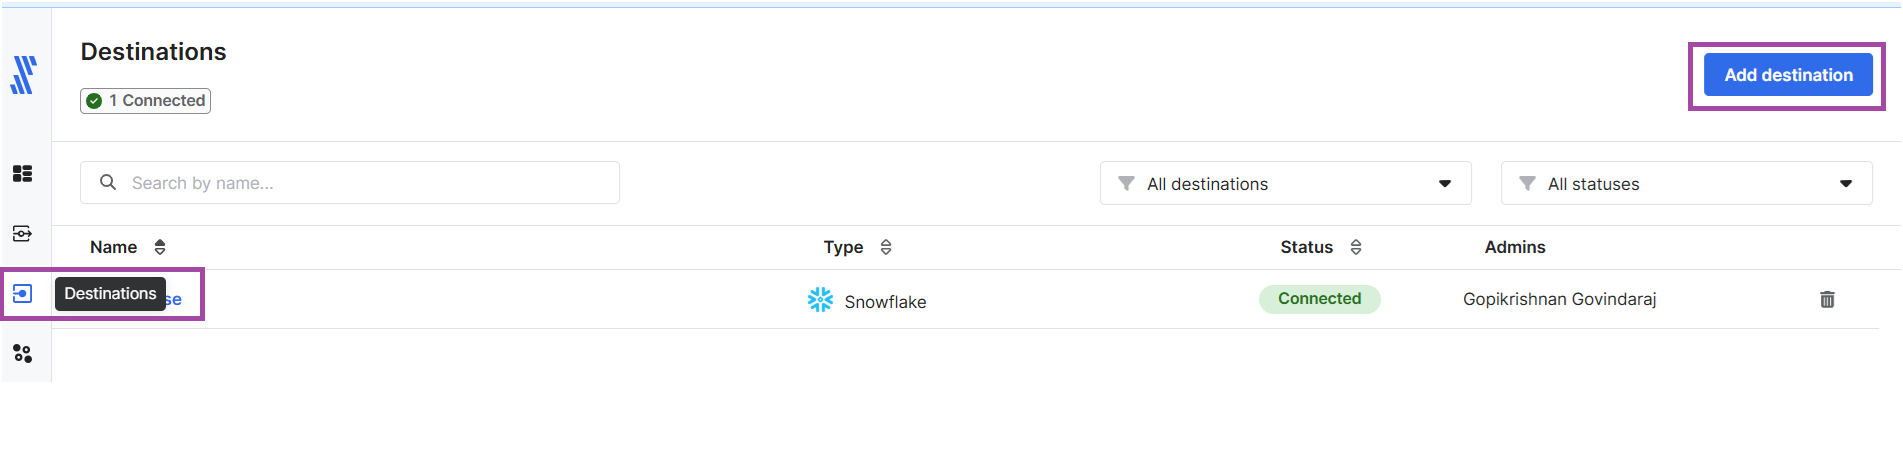
- Choose Snowflake
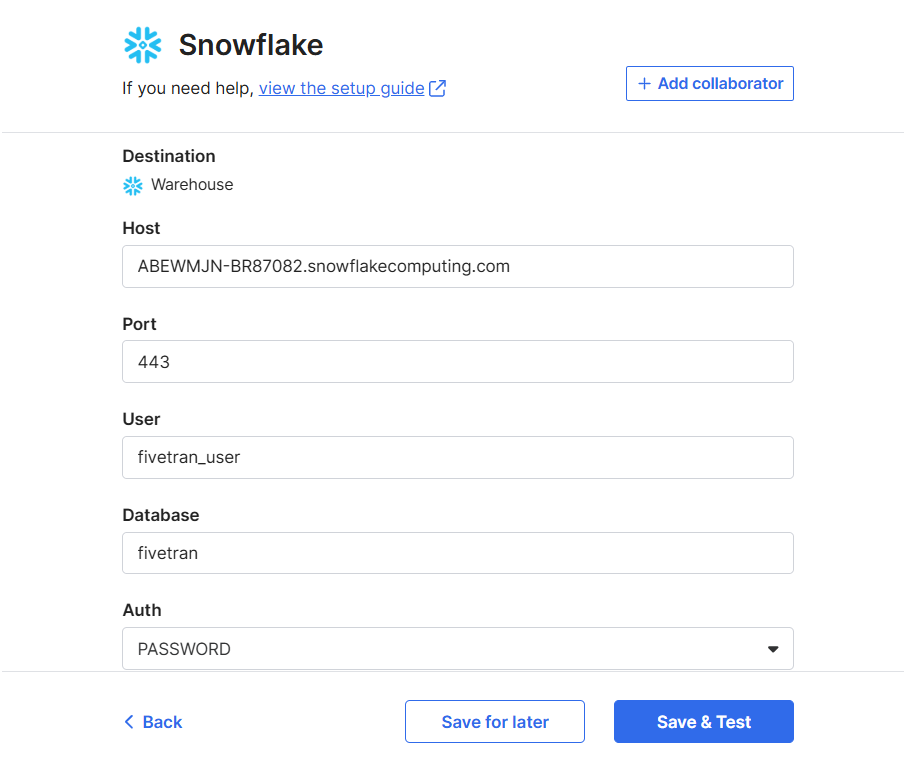
- Enter:
- Account ID (e.g.,
xy12345.ap-south-1) - Warehouse
- Database
- Schema
- User/Password or Key Pair Authentication
- Account ID (e.g.,
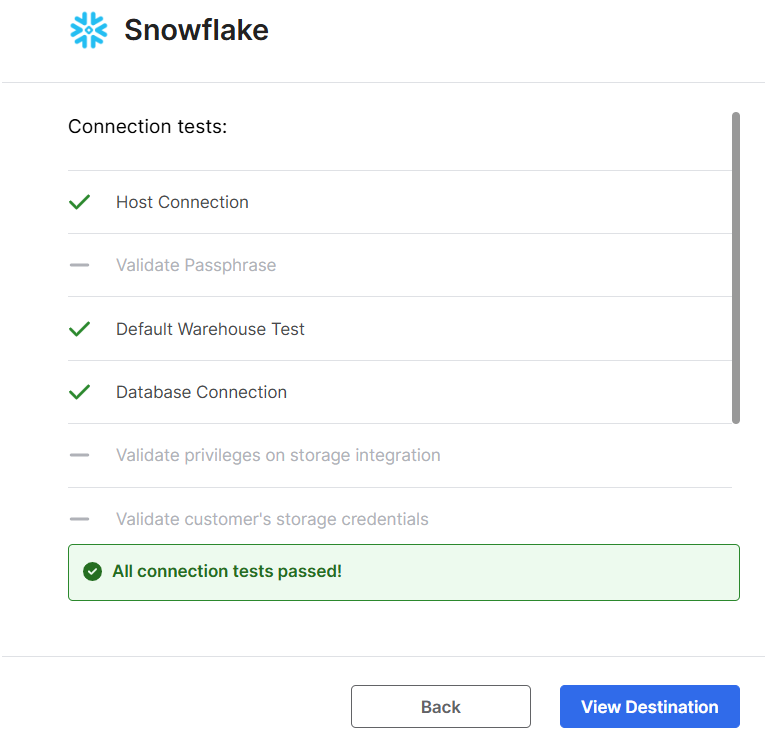
- Test the connection
🧠 Step 4: Configure File Parsing
- File format detection: Auto (or choose manually CSV, JSON, etc.)
- Configure:
- Header row
- Encoding (UTF-8, etc.)
- Delimiters
- Quoting
- Enable automatic schema detection
🔁 Step 5: Sync Settings
- Set sync frequency (e.g., every hour, daily)
- Choose file sync mode:
- Process once
- Rescan and update if modified
✅ Step 6: Run First Sync
- Click Start Initial Sync
- Monitor progress under the Connector Overview
- Tables will be created automatically in Snowflake
🔍 Monitoring Sync
- Go to the Connectors tab
- Click your connector
- View:
- Sync status
- Last sync time
- Schema changes
- Error logs (if any)
📘 Additional Resources
- Fivetran File Connector Docs
- Amazon S3 to Snowflake Setup Guide
- Advanced File Parsing
- Monitoring Syncs
- dbt Integration with Fivetran
🏁 Closing Notes
- Use the 14-day trial to evaluate performance and schema flexibility.
- For production use, consider using naming conventions in file names for auto-splitting into separate tables.
- Integrate with dbt or BI tools once data is landed in Snowflake.